Setting Up Google Cloud Messaging for Chrome
This article will explain in a prescriptive manner how to use the Google Cloud Messaging service as a mechanism for performing real-time interactions for your Chrome app or extension.
In Chrome’s documentation, there are two types of messaging services for Chrome: Google Cloud Messaging for Chrome V1 (which shall be abbreviated as GCM-C in this article) and Google Cloud Messaging (also confusingly named as Google Cloud Messaging for Android, which shall be abbreviated as GCM-A). The latter can be used for both the Chrome and Android platforms whereas the former is for use with Chrome only.
To utilise GCM-C, you need to use the chrome.pushMessaging API
within the Chrome environment, whereas with GCM-A, you need the
chrome.gcm API. Only at Chrome version 35 has chrome.gcm found
stable support; on the other hand, chrome.pushMessaging has been
supported since version 24.
The chrome.gcm API is a successor to chrome.pushMessaging, and
as a consequence, GCM-C is being deprecated in favor of GCM-A.
Despite that being the case, my project work is currently using
chrome.gcm and GCM-C. I am not too concerned about it at the
moment because Chrome 35 has just been released and Google has a
tradition of keeping its legacy infrastructure running for some time
before terminating it - at least reasonably long enough for
developers to transition to the new version.
1. Register with Google Developers Console
The first thing to do is to head over to Google Developers Console to create a project. You need to sign in with your Google account and create a project to get a set of credentials (client ID and client secret).
See the following images for the steps on getting the credentials (note that these images are correct as of this writing but may change by the time you are reading this as Google changes the application interfaces from time to time).
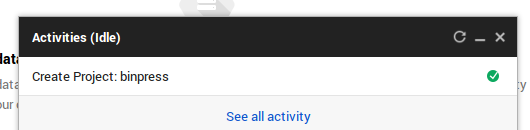
Create a project

At the time of writing, a panel at the bottom of the page indicates the project creation status.

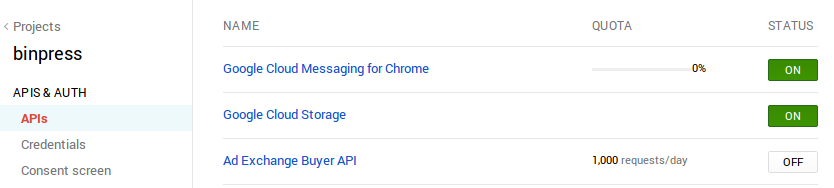
Go to APIs
Click on “APIS & AUTH” then “APIs”. Scroll down the page to look for “Google Cloud Messaging for Chrome” and click the “OFF” button on the right to turn the service on. This action will cause the entry to jump to the top of the page so you have to scroll back to the top to verify that “Google Cloud Messaging for Chrome” is “ON”.
Create Credentials
Click "Create new Client ID". A dialog box titled "Create Client ID" appears.
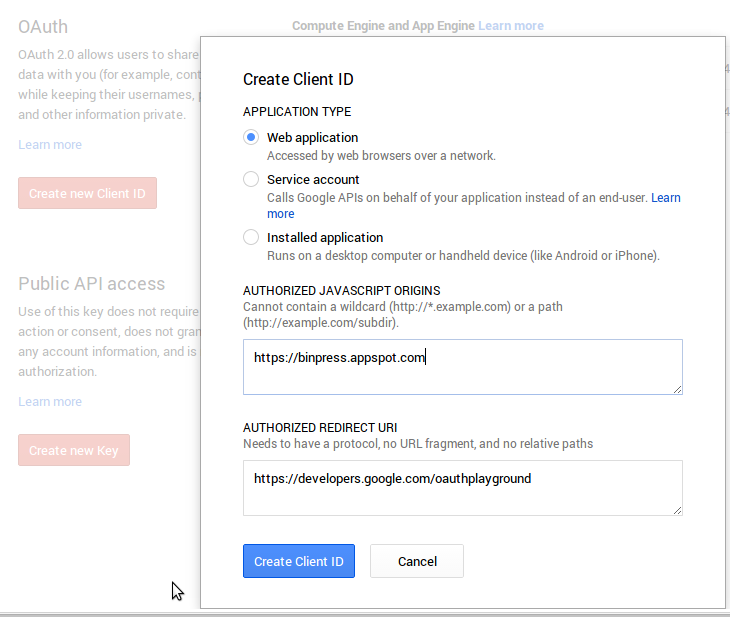
Select Web application.
Under "AUTHORIZED JAVASCRIPT ORIGINS" I entered
https://binpress.appspot.com as this is the AppEngine instance
that was created for this tutorial. (I had thought that this allows
you to set the authorized domains from which AJAX requests to push
messages can come from but it seems that the requests can originate
from any domain and GCM-C will still work.)
Under "AUTHORIZED REDIRECT URI", enter https://developers.google.com/oauthplayground. This is to
allow us to easily perform a one-time authorization for this set of
credentials.
Click Create Client ID to create the access credentials.
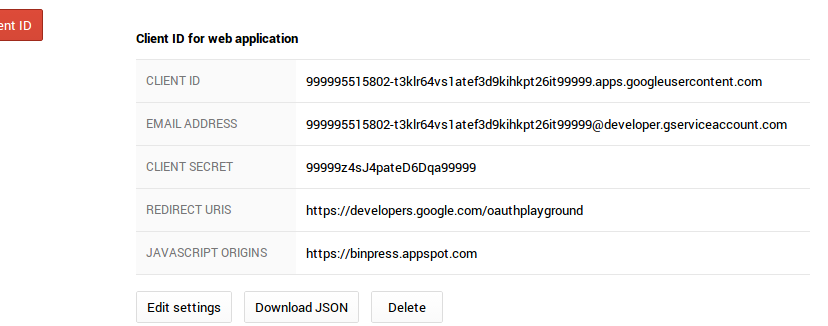
Once that is done, you get a set of credentials in the same page looking something like this (actual values have been doctored):
Get Access/Refresh Tokens
The steps above for creating the credentials are only the first part. To actually access the service, you need to use an access token.
The access token, however, has a validity of about an hour, after which you will need a refresh token to request for a fresh access token.
To get the tokens, go to the OAuth 2.0 Playground. Notice that this is the same link as that entered when creating the credentials under "AUTHORIZED REDIRECT URI".
Click the OAuth 2.0 Configuration gear button at the top right corner of the page.
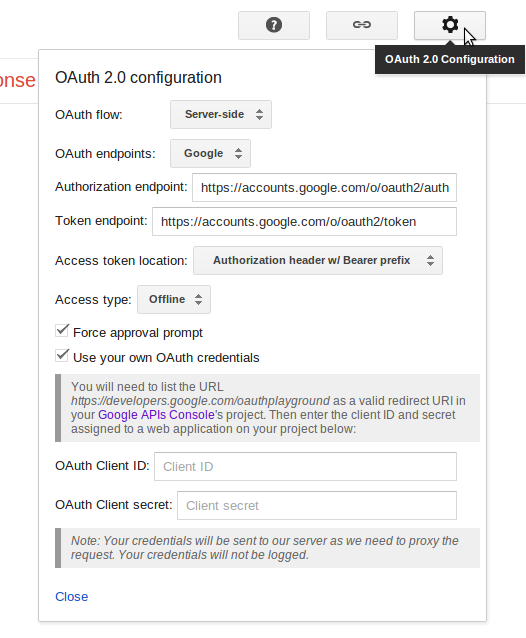
Enter the client ID and client secret from above into OAuth Client ID and OAuth Client secret respectively and then click Close.
Next, under "Step 1 Select & authorize APIs" look for the "Input
your own scopes" text field and enter
https://www.googleapis.com/auth/gcm_for_chrome. Click
Authorize APIs.
Once you click the button, you will be brought to a page that looks like the following prompting you for your permission to "Manage messages sent to your Chrome app or extension".
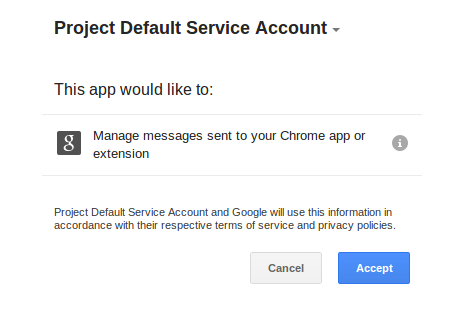
If you are not logged in, you will be prompted to login with your Google account first. The Google account that you log in with should be the one that you will use to upload for Chrome app/extension.
After you grant permission, you will be redirected back to the OAuth 2.0 Playground page that now shows "Step 2 Exchange authorization code for tokens". Click the Exchange authorization code for tokens button to get the refresh token and access token. You will see that a timer appears on the page indicating the remaining validity of the access token after it is granted.
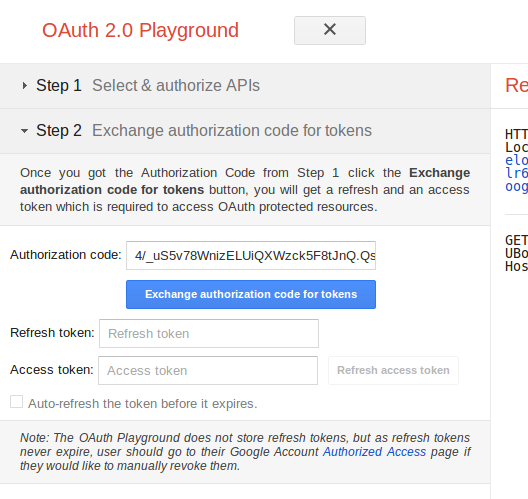
The most important piece of information to take note here is the Refresh token. This must be kept secret because this token basically allows any one to send messages to your Chrome app/extension. It also does not expire, unlike the access token.
2. Get the App/Extension ID
This ZIP file contains a skeleton Chrome app named "Xena" that you can use to test the setup. Only the important bits of this app are highlighted here.
First off, the pushMessaging permission needs to be set in
manifest.json.
"permissions": [
    "pushMessaging"
]
The background script background.js listens for any message coming
in from GCM-C using this:
chrome.pushMessaging.onMessage.addListener(function (msg) {
    console.log(msg);
});
In order for the server to be able to send messages, it needs to
know the identifier of the user to send to. This identifier is the
channel ID that can be retrieved through the pushMessaging API.
In the sample code, the page displays a button that will allow you
to get the channelId for the user. In order for the channelId to
be available, the user needs to be signed in to Chrome. It is also
recommended in the documentation to first call the API
in a non-interactive while getting the channelId. The interactive
mode should be used only when the first call fails.
The difference between the two modes is that the interactive one will prompt the user to sign in to Google in order to get the ID. The reason why it is discouraged from being used right at the beginning is that it provides no context to the user why there is a need to sign in.
chrome.pushMessaging.getChannelId(false, function (channel) {
    if (!channel || !channel.channelId) {
        chrome.pushMessaging.getChannelId(true, function (channel) {
            //send the channelId to the server
        }
    } else {
        //send the channelId to the server
    }
});
In a normal scenario you will be writing code to send the
channelId to the server to be saved and associated with the user
identity. Here, we will just be taking note of the ID that is
displayed on the page to be used to send messages to.
Uploading the App
"Why do you need to upload the app if this is only for testing?"
The reason why this sample app that is used in this tutorial has to be uploaded is because of GCM-C.
Up to this point, you actually have all the necessary pieces in place to send a message through GCM-C. However, the message will not be delivered - instead you will get an error message if you attempt to do so.
GCM-C can only deliver messages to apps/extensions that are registered in the Chrome Web Store, therefore you have to upload the extension via the Chrome Web Store Developer Dashboard.
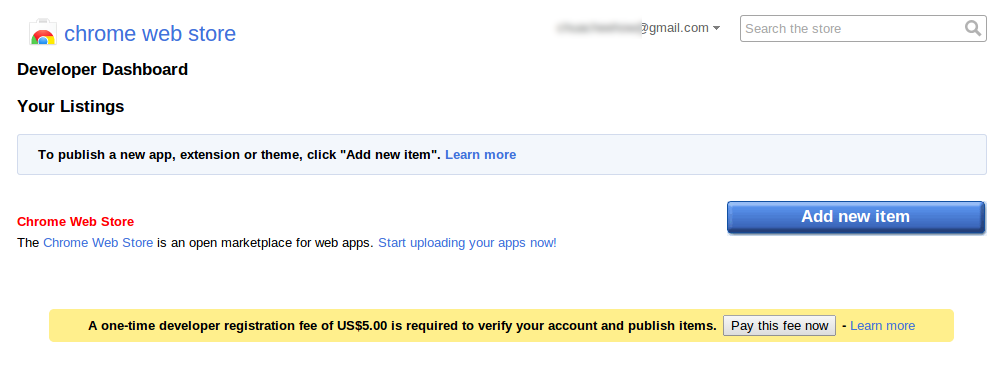
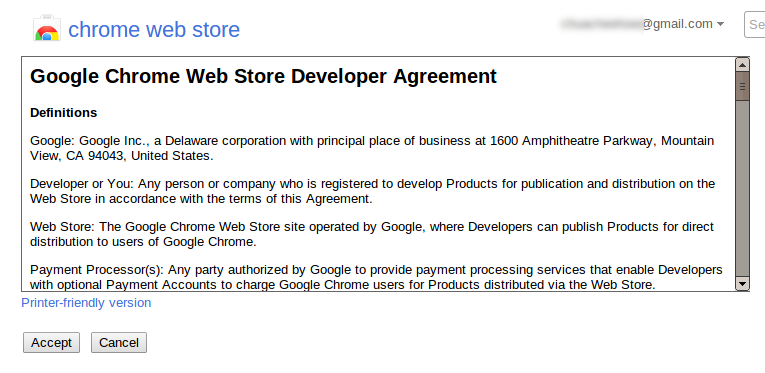
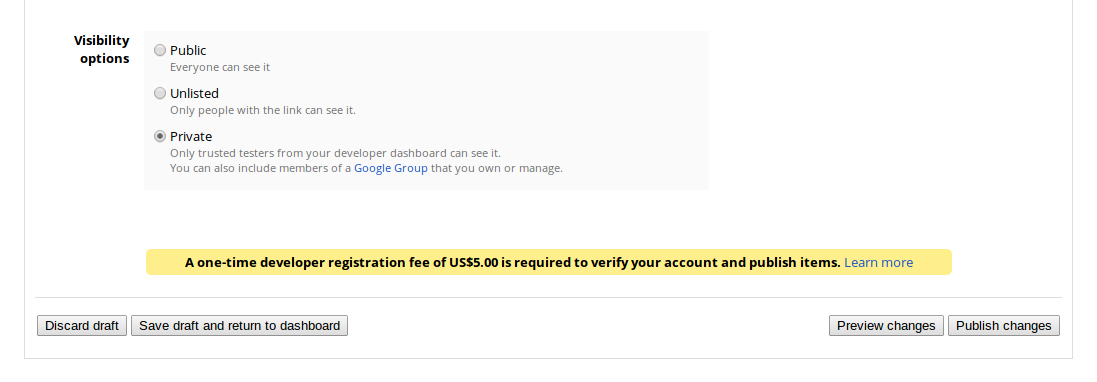
New developers are prompted to pay a one-time listing fee for publishing items to the Chrome Web Store. You can do this now or later. If you are using your Google Apps account, you can even make your app/extension private or unlisted to avoid paying the fee. You are also required to consent to the Developer agreement if this is your first time in the dashboard.
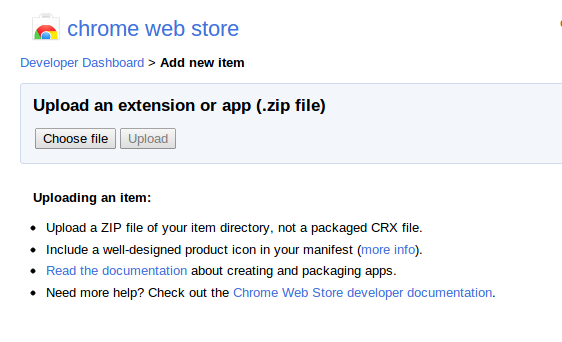
After accepting the agreement, you can then upload your application. Note that this has to be a ZIP file of the contents of your application. You can use the sample [ZIP file][zip1] to upload.
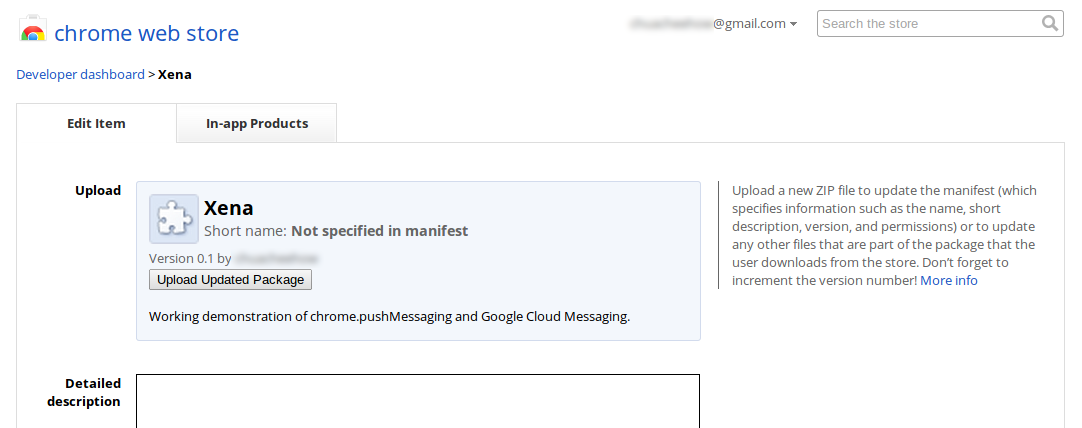
There are several other fields that you need to fill in which you will be prompted upon clicking "Publish changes". You can use the images in the ZIP file as the Icon, Screenshots and Promotional tile images.
Before publishing the application, the last step is to select the visibility of your app/extension in the Web Store.
It will take a while for the app/extension to be fully published. Once that happens, you can then install the app/extension from the Chrome Web Store but you do not have to. What is needed is the key of the extension.
From the dashboard, click on the "More info" link to reveal a drop-down of the application's Item ID and Public key.

You have to copy the key (the entire block of text between
-----BEGIN PUBLIC KEY----- and -----END PUBLIC KEY-----) to the
original manifest.json file under the property key.
3. Testing the Service
To recap, we have:
- the access token to authenticate the server request
- the refresh token to get new access tokens
- the
channelIdidentifying the user - the registered key of the application in Chrome Web Store
Refresh Access Token
The access token to authorize your server requests is valid for around an hour. It is typical to store both the refresh token and access token, and manage the lifetime of the access token by a server application. There is a rate limit imposed by Google on the frequency of requesting for new access tokens within a short (unspecified) period of time, thus it is easier to manage the tokens from the server side rather than from individual clients.
The following CURL request will get a new access token from Google:
curl -X POST -H 'Content-Type: application/x-www-form-urlencoded'
-d "client_id=<client_id>&client_secret=<client_secret>&refresh_token=<refresh_token>&grant_type=refresh_token" https://accounts.google.com/o/oauth2/token
The response looks something like this:
{
    "access_token":"<access_token>",
    "expires_in":3600,
    "token_type":"Bearer"
}
More detailed information can be found from the API Reference for GCM service.
Send Message to User
After all the tedious setup steps above, the actual API for utilizing the service is actually very simple.
Proceed with this section if the access token's validity has not expired. If it has expired or if you are not sure, see Refresh Access Token above.
To post a message, the server should send a POST request to
https://www.googleapis.com/gcm_for_chrome/v1/messages containing a
JSON payload like so:
{
    "channelId": "<channelId>",
    "subchannelId": "0",
    "payload": "Message goes here."
}
The signalling mechanism rather than a data transfer alternative.
You can use the following CURL command to issue a message to the sample app:
curl -X POST -H 'Content-Type: application/json' -H 'Authorization: Bearer
<access_token>' -d '{"channelId": "<channelId>", "subchannelId": "0",
"payload": "A test message"}'
https://www.googleapis.com/gcm_for_chrome/v1/messages
The channelId can be retrieved from the app's "Get Channel ID"
button.
Summary
So this is how you can use GCM-C for your Chrome app or extension. It is a lot more work setting up the pieces than writing coding. The "heavy investment" in setting up means that once you get this part out of the way, the actual coding to make use of the infrastructure is very simple.
Troubleshooting
If you get a response that looks like the following after sending a request to send a message, it implies that your Chrome app/extension is not set up correctly.
{
        "error": {
        "errors": [
            {
                "domain": "gcmForChrome.message",
                "reason": "forbiddenForNonAppOwner",
                "message": "A message can only be sent by the owner of the app."
            }
        ],
        "code": 403,
        "message": "A message can only be sent by the owner of the app."
    }
}
One requisite for the request to work is for the app/extension to be uploaded to the Chrome Web Store so that it is registered with GCM-C.
Another issue that is a common cause of the error message is the
omission of the key property in the manifest.json file. Make
sure the key field is present in the file and contains the value
of the public key.